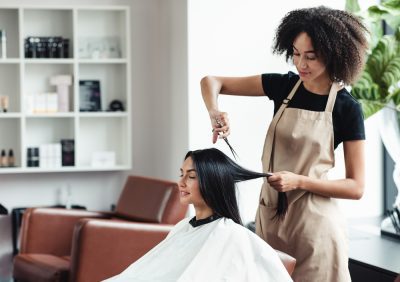
You know that feeling when you leave the salon with silky, bouncy hair that catches the light just right? Turns out you can get those same results at home using ingredients you probably already have in your kitchen. No lie — this DIY treatment is converting people who used to drop $200 every six weeks on professional treatments.
Here’s the thing: your hair doesn’t care if expensive ingredients come from a fancy bottle or your pantry. It just wants the right nutrients to repair damage and restore shine.
The viral recipe everyone’s talking about
The treatment that’s got people canceling their salon appointments combines coconut oil, honey, an egg, and apple cider vinegar. Sounds weird? Maybe. But the science behind why it works is solid, and the results speak for themselves.
Mix 2 tablespoons melted coconut oil, 1 tablespoon raw honey, 1 egg yolk, and 1 teaspoon apple cider vinegar. That’s it. No fancy equipment needed — just a bowl and a whisk.
The mixture should be smooth but not too thick. If it feels goopy, add a tiny bit more oil. If it’s too runny, let it sit for a few minutes — the honey and egg will naturally thicken it up.
Why these ingredients actually work
Let’s be real about what each ingredient brings to the party. Coconut oil penetrates the hair shaft better than most commercial conditioners because its molecules are small enough to actually get inside damaged hair. It’s not just sitting on top making things feel slippery.
Honey is a humectant, which means it pulls moisture from the air and locks it into your hair. Plus, it has natural antimicrobial properties that keep your scalp healthy. Raw honey works best because it hasn’t been processed to death.
Egg yolk is packed with proteins and fats that temporarily fill in damaged areas of your hair shaft. Think of it like spackling for split ends — not a permanent fix, but it makes everything look smoother until your next wash.
Apple cider vinegar balances your hair’s pH and removes buildup from styling products. Ever notice how your hair feels different after swimming in the ocean? That’s salt doing what ACV does — clarifying without stripping.
Application technique that makes all the difference
Start with damp (not soaking) hair. The treatment spreads easier and penetrates better when your hair has some moisture but isn’t dripping wet. Work the mixture through from mid-length to ends, avoiding your roots unless your scalp is super dry.
Here’s where people mess up: they rush the process. Take your time working it through each section. Use a wide-tooth comb to distribute evenly, then twist your hair up and clip it away from your face.
Let it sit for 30-45 minutes. Some people wrap their hair in plastic wrap or a shower cap, but honestly? Just putting it up and letting it air dry a bit works fine.
The rinse that seals the deal
Rinse with cool water first to remove most of the treatment, then shampoo once with a gentle cleanser. Don’t go crazy scrubbing — you want to remove the treatment without stripping away all the good stuff you just added.
Skip conditioner this time. Your hair already got deep conditioning from the treatment, and adding more product might weigh it down or make it feel greasy.
Why people are ditching the salon
Professional deep conditioning treatments cost anywhere from $50 to $150, and you need them every 4-6 weeks to maintain results. This homemade version costs maybe $3 per treatment and works just as well for most people.
Plus, you control exactly what goes on your hair. No mystery chemicals, no sulfates, no ingredients you can’t pronounce. Just simple stuff that’s been used for hair care for centuries.
The convenience factor is huge too. No scheduling appointments weeks in advance, no sitting in a chair for three hours, no small talk when you’re not feeling chatty.
When to use it and how often
This treatment works best on damaged, dry, or chemically processed hair. If your hair is naturally oily, use it sparingly — maybe once a month. For dry or damaged hair, you can do it weekly without overdoing it.
Don’t use it right after coloring your hair. Wait at least a week to let your color settle. The acidic vinegar could potentially fade fresh color if used too soon.
Customizing for your hair type
Fine hair? Use less coconut oil and more honey to avoid weighing things down. Thick, coarse hair? Double the coconut oil and add an extra egg yolk for more intensive repair.
If you’re dealing with serious damage from bleaching or heat styling, add a tablespoon of mayonnaise to the mix. Sounds gross but works amazingly well for fried hair.
Setting realistic expectations
This treatment won’t fix split ends or reverse years of damage overnight. What it will do is improve your hair’s texture, add shine, and make it more manageable. The effects are temporary but cumulative — regular use leads to generally healthier-looking hair.
Some people see dramatic results after one treatment, others need a few sessions to notice a difference. It depends on your starting point and hair type.
Your salon stylist might not love that you’re skipping appointments, but your wallet definitely will. And honestly? When you’re getting professional-level results at home, why wouldn’t you make the switch?


